Here is how configure the network unit and make it work with HomeSeer.
Connect the unit to your home network.
The Z-wave 800 and ZigBee 3 Network Unit can be powered by either USBC or PoE. Make sure your eithernet cable supports PoE if you don’t power it with usb-c.Download the configuration software here. Unzip it and run it on Windows. Make sure you PC is in the same subnet where the Z-Wave 800 Network Unit was plugged in step 2.

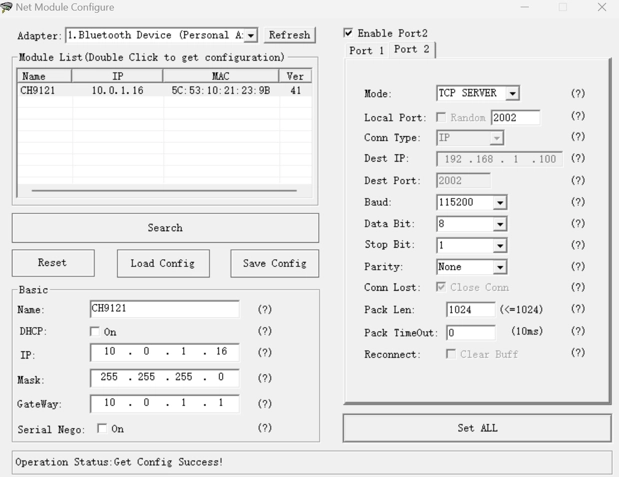
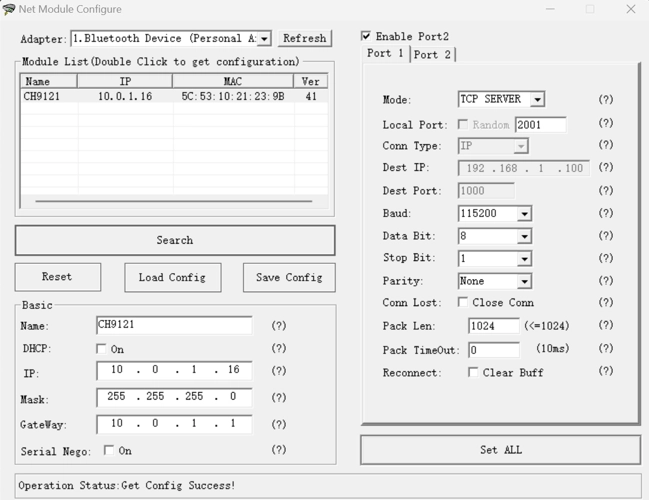
Click search button as shown on the previous picture, the Network Unit should be found and displayed in the table (see picture above). Double click the unit which was found, the default configurations should be displayed. Set the DHCP or static IP, TCP server, IP and port.

Go to the HS4 UI and the following:
– Click the “Plugins”
– Click “Z-Wave” under the Plugins menu
– Click “Controller Management“ under “Z-Wave”
– Click “Add Interface” under “Controller Management”Select Interface Model to Ethernet Interface, and enter the port and IP address.
Enable it and include your Z-Wave devices.
Update HS4 to 4.2.22.4, install plugin ZigBee
Plus 1.0.6.0 and Z-Wave Plus 1.0.9.0Login to HS4 system
Note: don’t forget to replace “HS4-IP” with the actual IP address.ssh homeseer@HS4-IPRun the following script:
Note: please replace “X.XX.X” with the version number that you intend to install.sudo curl -fsSL https://deb.nodesource.com/setup_22.x | sudo -E bash -
sudo apt-get install -y nodejs git make g++ gcc libsystemd-dev make
node --version
npm –version
cd /usr/local/HomeSeer
sudo bin/ZigbeePlus/install_z2m.sh X.XX.X
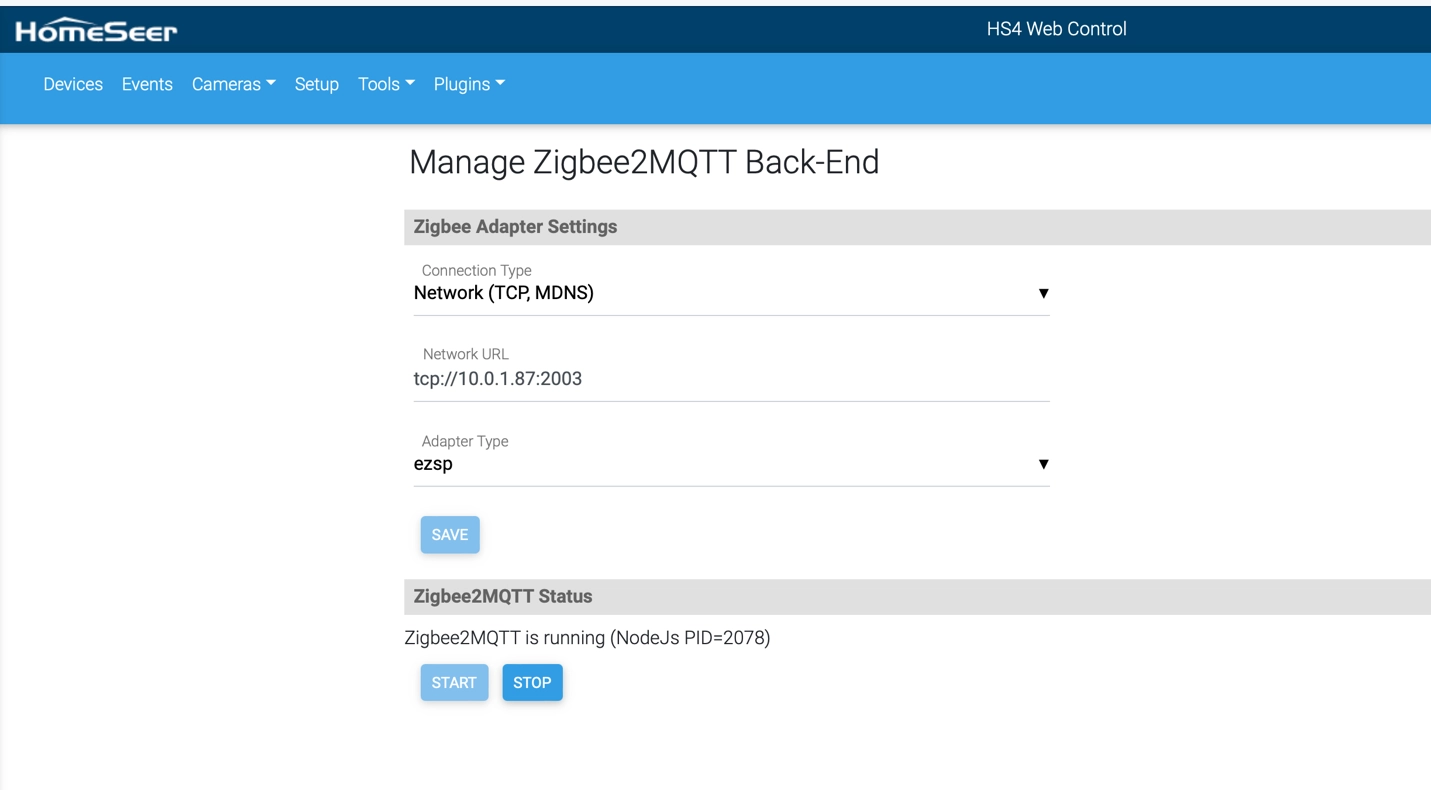
10. Do the following in the HS4 Web Control
Note: The Z-Wave default port is 2000, and ZigBee default port is 3000. Enable ZigBee plus, and set:
